In our era of social media with applications such as Twitter, Facebook, and Instagram, posting about ourselves is a common occurrence. However, it is important to ensure that you establish an online presence that demonstrates your academic skills and competencies so that you are ready for the next steps of your professional journey. Many internships and job opportunities now require individuals to submit an electronic portfolio or blog site as a part of their application. This lesson will focus on setting up a template for your electronic portfolio (aka ePortfolio) that you will build over the course of this class, and hopefully, throughout your academic journey. Be thoughtful on how you present yourself as we want this to be a tool that you can take advantage of in the future!
Review the Required Resources thoroughly BEFORE going through the Graded Activities. Please be aware of the due dates associated with this lesson.
Required Resources
Setting Up Your ePortfolio
The Professional Portfolio is an online portfolio that you will create to showcase not only some of your work from this course, but some of the work you have completed during your time as an undergraduate student at UH Manoa. It is a wonderful way for you to display your work and after this course it could be updated and shared for graduate school, internship, and job applications.
Follow the instructions in the Professional Portfolio Guidelines to complete your portfolio. Submit the link to your portfolio in Laulima Assignments by the due date. View thw sample portfolios below in resources.
Benefits of an ePortfolio
(Estimated time to complete: 3 minutes)
Review the following website on the Benefits of Having an Electronic Portfolio.
Practice
Do a Google Search for “benefits of an online portfolio for students”. Did you find any other ways in which portfolios may benefit you in the future? If so add this as your first post to your ePortfolio.
ePortfolio Inspirations
(Estimated time to complete: 10 minutes)
Review the following examples of ePortfolios for inspiration. These are shared with you to give you a taste of what has been done. The ePortfolio examples are slightly different from what is being asked of you in this lesson, and course, but still relevant.
- University of Hawai‘i at Mānoa Food Science and Human Nutrition Alumni Keala Swafford’s Portfolio
- University of Hawai‘i at Mānoa Food Science and Human Nutrition Alumni Dietetic Student Portfolios
Practice
After searching through the examples did you have a favorite? If so, post a link to it and state why it was your favorite to your ePortfolio. View these instructions on how to post to your ePortfolio.
Creating, Editing, and Sharing Videos
(Estimated time to complete: 15 minutes)
One of the ways that you will use to show off your skills in your ePortfolio is through creating, editing and sharing videos. In this section we will review creating, editing, and sharing a video using YouTube.
The following instructions are for recording on your computer. You are free to use the device of your choice, but the video should be uploaded to YouTube.
Record your video:
Screencastify is an excellent tool that you can use to record a video. Other options include using your mobile device or your Mac computer.
Upload your video to YouTube:
Use this page for instructions on uploading to YouTube from either your computer or tablet/phone. These instructions assume you already have a YouTube account.
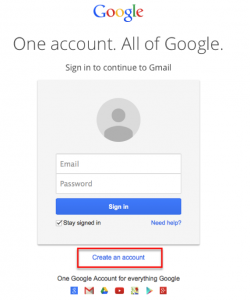
If you don’t have a YouTube account:
Go to YouTube.com and click on Sign in. If you already have a Google account (you do if you have an @gmail.com email address) use it to sign in to YouTube, or click on Create an account to set up a Google account. This Google account is separate from your UH account. While UH uses Google tools that you can access with your hawaii.edu account, YouTube is NOT one of them.
Once you have a Google account, use it to sign in to YouTube.
(Creating a Google account)
While your video is uploading, change your privacy setting for the video, choose either public or unlisted. Then, enter in the name of your video. For example “Ari introduction”. Next, click Save changes.
Once you’ve saved your changes (or Publish), click on Video Manager to see a list of your uploaded videos.
Edit & Share:
Click on the Edit button next to your introduction video. You’ll see a video settings window. Choose a different thumbnail image for your video if you wish. Make sure you’ve made your video unlisted or public. Now copy the video link. You can paste this link directly into a page or post on your ePortfolio and it will embed the video.
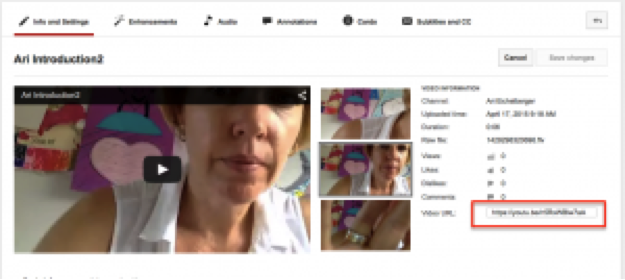
(YouTube video setting)
If you need further support with editing your video check out this Trim-Video edTPA Guide.
Beware of Copyright:
YouTube runs an automated system by which it detects any copyrighted music in the background of a YouTube video, and will block it (including in the US) if it finds copyrighted music (and the copyright holder agrees – they always agree).
For a quick clarification on terms see below:
Copyrighted: All creative works in the US are copyrighted the instant they are made. If the creator does not sell the copyright, then it’s up to them how it’s used. If they give permission, then you can use it. Otherwise, you may not use it. In order to use a song, you must get permission somehow from the copyright holder.
Licensed: Some creative works are deliberately licensed for sharing. The mere fact that they are copyrighted does not forbid their use, it’s the lack of a license.
If you would like to use music in your video, the easiest way around this problem is to use music specifically licensed for reuse, such as the music included in YouTube’s own editor, or anything under a Creative Commons license. Resources that you can use to identify music specifically licensed for reuse include Jamendo and CCMixter.